

How to Organize a Workshop on Budget: 7-Step Plan
Table of Contents
- Step 1: Sort Everything Into Keep, Discard and Donate
- Step 2: Set a Realistic Budget Before You Buy Anything
- Step 3: Plan Your Workshop Layout Around How You Actually Work
- Step 4: Get Materials Off the Floor With Cheap Shelving
- Step 5: DIY Workshop Storage Ideas That Cost Under $100
- Step 6: Best Workshop Storage Systems for Tools and Small Parts
- Small Workshop Organisation Tips for Tight Spaces
- Step 7: Storing Hazardous Items and Keeping the Workshop Safe
- Frequently Asked Questions
Last Updated: October 21, 2026
Step 1: Sort Everything Into Keep, Discard and Donate
Learning how to organize workshop on budget starts with a hard truth: you cannot store your way out of clutter.
We see the same pattern in almost every garage and shed. People buy shelves before they clear the floor.
Most guides stop at "make three piles". That is a category, not a process.
Work One Zone at a Time
Do not empty the whole workshop at once. That approach fails every time. Pick a single zone, one wall, one bench, one shelf, and finish it before moving on. A finished zone gives you somewhere to put things back and keeps momentum going.
Measure Before You Sort
Before you touch anything, note the dimensions of the zone: wall length, shelf depth and the height to the ceiling. This matters because the sorting decision and the storage decision are linked. An item you keep needs a home that fits the space you actually have. Measuring first stops you keeping things you have nowhere to put.
Group by Use, Not by Type
Once the zone is empty, group items by how you use them, not by what they are. The tools you reach for on every job belong together. The ones you use twice a year belong together somewhere else. Grouping by use is what makes the later storage layout work, because it puts the most-used items closest to the bench.
A practical grouping:
- Daily use: hand tools, tape, pencil, safety glasses
- Weekly or monthly use: power tools, clamps, drill bits
- Seasonal or rare use: specialist jigs, large timber offcuts, spare paint
Apply a Decision Rule to Every Item
For each item, ask three questions in order:
- Have I used it in the last year?
- Is it safe and in working order?
- Do I have another one already?
If the answer to the first is no and the item is cheap to replace, it goes to discard or donate. If it is unsafe, it goes to discard regardless of value. If it is a duplicate, keep the better one and donate the other.
Deal With the Holding Box
Some items are genuinely hard to call. Put them in a labelled holding box with the date you sealed it. If you have not opened it in six months, the decision is made for you: donate or discard. This one rule clears more clutter than any amount of agonising.
Sort the Discard Pile Properly
Do not just bin everything. Separate it into three streams:
- Recycling: metals, cardboard and clean timber offcuts
- Safe disposal: paints, solvents, batteries and anything with a chemical label, check your local council's household chemical collection service rather than putting these in the bin
- Donate or sell: working tools and surplus materials
This step matters for safety as much as for space. Old paint tins and unknown chemicals are the most common hazard found in a cluttered shed.
Record What You Kept
A simple inventory makes the rest of the job easier. Note what you kept, roughly how much space it needs and which group it belongs to. You do not need a spreadsheet, though one helps. The inventory tells you what storage to buy in Step 2, so you buy for the items you actually have rather than guessing.
Why This Saves Money
Sorting is also where the budget starts. Every item you discard is money you don't need to spend on storage. Every duplicate you donate is a bin you do not have to buy. And every item you group by use is a shelf you can plan around instead of guessing at.
Step 2: Set a Realistic Budget Before You Buy Anything
The biggest mistake with a workshop clean-up is buying as you go. You spot a shelving unit, grab it, then find it doesn't fit the wall you had in mind.
Most guides tell you to "work within your budget" and stop there. That is not a method. Here is a repeatable one you can apply whatever your total is.
Work Out Your Total Before You Allocate It
Start with a figure you can spend without touching money you need for anything else. A common pattern is to set a total, then hold back roughly 10 per cent as a contingency for fixings, brackets, anchors and the odd item you did not plan for.
Write the total down and keep it visible. Every purchase comes out of that number, not out of a vague sense of what feels affordable.
Allocate by Priority, Not by Category
A simple split that works for most home workshops:
- Floor reclamation first: shelving and racks, because getting timber, cases and tubs off the floor frees more usable space than any other single purchase
- Wall storage second: peg board, bin racks and tool holders, which turn vertical space into working storage
- Small parts storage third: bins, dividers and labels for screws, fixings and hand tools
That order matters. If you spend the whole budget on a peg board wall and still have timber stacked in the walkway, you have not solved the problem the keyword is about.
Apply the 70/20/10 Rule of Thumb
A workable starting point is to put roughly 70 per cent of the budget into the big structural items (racks, shelving, a bench upgrade), about 20 per cent into small parts storage and wall systems, and the remaining 10 per cent into safety and labelling. Adjust the split to your situation, but keep the shape: most of the money goes to the things that carry weight and reclaim floor space.
Decide What You Will Not Buy
A budget only works if it has a boundary. Before you shop, write a short "not now" list. Common entries are a second workbench, a dust extraction system and powered tool storage. These are worth having eventually, but buying them first is how a budget clean-up turns into an expensive refit that never gets finished.
Where the Money Actually Goes
As a rough guide for planning, not a quote:
- A basic five-tier boltless steel rack is a significant investment
- A wall-mounted bin rack with around 60 detachable bins is a modest one-off cost
- A peg board panel and a set of hooks is one of the cheapest ways to get hand tools off the bench
Prices vary by size, load rating and retailer, so check current listings before you commit. The point is to know the order of magnitude before you walk into the store, so a single item cannot swallow the whole budget.

Track It as You Go
Keep a simple running total. A note on your phone is enough. Every time you buy something, subtract it. When the number gets low, stop and reassess rather than drifting over. The discipline of tracking is what separates a budget that holds from one that quietly doubles.
Step 3: Plan Your Workshop Layout Around How You Actually Work
A workshop layout is the arrangement of benches, storage and walkways based on the tasks you do most.
Giantz 60-Bin Wall-Mounted Storage Rack →
Walk through a typical project in your head. Where do you cut? Where do you assemble?
Then follow three rules:
- Keep the workbench within arm's reach of your most-used tools
- Leave a clear walkway between benches and shelves
- Put heavy items low and light items high
Most guides get this wrong. They plan storage around the walls and forget the middle of the room.
Layout Examples for Single-Car and Double-Garage Workshops
A single-car garage works best with an L-shaped layout. Put the bench along one wall, shelving on the opposite wall, and keep a clear path down the middle.
A double garage gives you room for a workbench island. Run shelving along both side walls and keep the centre open for assembly and movement.
Both layouts share one rule: nothing lives on the floor except benches and mobile units.
Step 4: Get Materials Off the Floor With Cheap Shelving
Floor space is the most expensive real estate in any workshop. Cheap steel shelving is the fastest way to reclaim it.
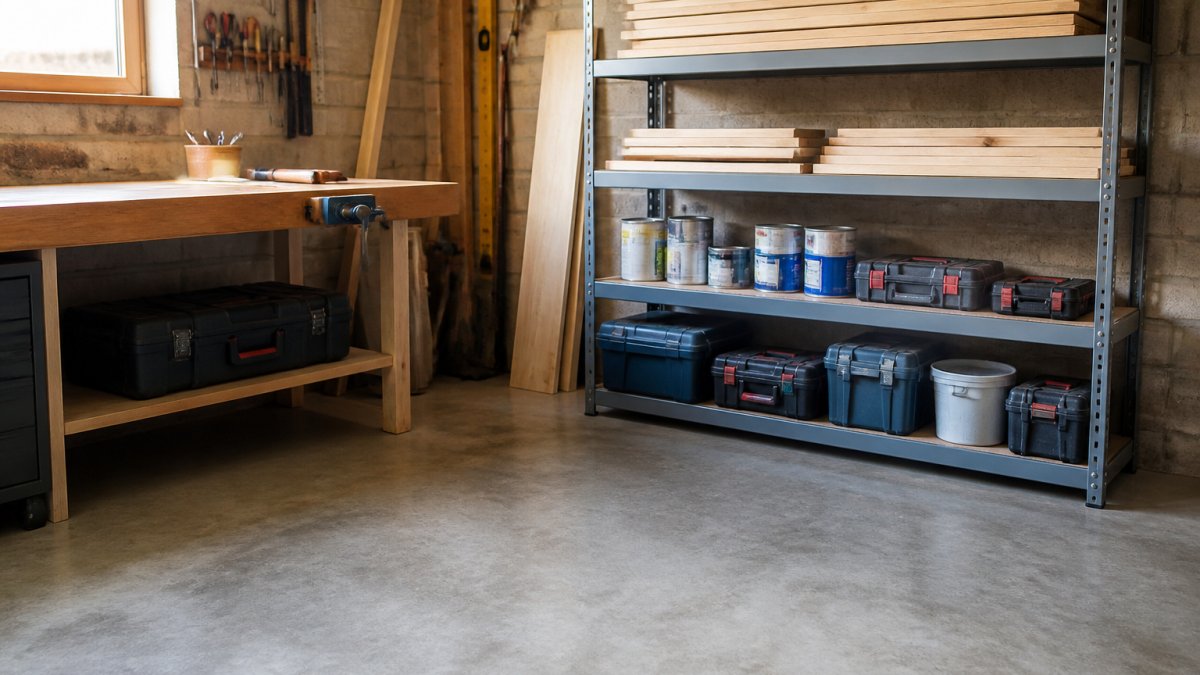
Place racks against walls, never in the middle of the floor.
If you rent, choose freestanding racks. They need no drilling and move with you when you go.
Step 5: DIY Workshop Storage Ideas That Cost Under $100
You do not need to spend big. A few low-cost moves transform a messy bench.
- Mount a wall rack of small plastic bins for screws, nails and fixings
- Hang hand tools on a peg board above the bench
- Repurpose glass jars for nails and washers
The wall rack is the standout. A wall-mounted bin rack with 60 detachable bins holds a huge amount of small parts, and the bins lift off so you can carry them to the job.

Step 6: Best Workshop Storage Systems for Tools and Small Parts
The best workshop storage systems combine wall-mounted racks for small parts with shelving for bulky goods.

For small parts, a peg board rack with adjustable tool holders works well.
For hand tools, a wall-mounted rack with shelves and holders keeps screwdrivers, spanners and pliers visible and within reach.
For bulky materials, steel shelving does the heavy lifting. Keep the two systems separate.
Small Workshop Organisation Tips for Tight Spaces
Small workshop organisation tips come down to one idea: use the walls and keep the floor clear. A tight space rewards vertical storage more than any other approach.
- Store vertically wherever you can
- Choose mobile units so you can roll them out of the way
- Keep only daily-use tools on the bench
Step 7: Storing Hazardous Items and Keeping the Workshop Safe
Workshop safety starts with how you store dangerous items. Fuels, solvents, paints and sharp tools need their own plan.
- Keep fuels and solvents in a locked metal cabinet, away from ignition sources
- Store paints and chemicals on a low shelf, never overhead
- Keep a fire extinguisher near the door and check it regularly
Electrical safety matters too. Keep power leads off the floor and away from walkways, and never run cords near water.
Check your local fire authority's guidance on storing flammable liquids at home, and follow the limits for your shed or garage.
Frequently Asked Questions
How can I organize a workshop on a tight budget?
Start by sorting everything into keep, discard and donate piles before spending a cent, because most workshops are short on space, not storage. Then set a budget and buy in priority order: shelving to get materials off the floor first, then wall storage for tools and small parts. Wall-mounted bin racks start around $31 to $64, and a 1.8m steel shelving rack with five tiers and a 200kg-per-tier capacity costs $85. Spreading purchases over a few months keeps the cost manageable without compromising on load ratings.
Are DIY workshop storage ideas cheaper than buying pre-made organisers?
Sometimes, but not always. Homemade shelves built from scrap timber and brackets can cost less than $30 in materials, yet they rarely match the load ratings of steel units. A pre-made rack rated to 200kg per tier for $85 is often better value once you factor in time, fixings and the risk of a shelf failing under heavy tool cases. The smartest approach is to DIY the cheap items, such as pegboard offcuts and jar storage for screws, and buy rated systems for anything holding real weight.
What are the best workshop storage systems for a small space?
Wall-mounted systems win in small workshops because they use height instead of floor area. A 60-bin wall rack with a 72kg total capacity gives you labelled, detachable bins for screws, fixings and small parts without taking up bench space. Pegboard racks with removable tool holders let you rearrange the layout as your tool collection grows. Pair these with a tall shelving unit in a corner and you free up the floor for a mobile workbench, which you can wheel out of the way when the car needs to go back in.
How do I stop my workshop getting cluttered again after organising it?
Build a five-minute reset into the end of every project. Put tools back on the pegboard, return detachable bins to their rack and clear the bench before you down tools. Label every bin with a sticker or marker pen so nothing gets dumped in the wrong place. Once a month, do a quick pass on the discard pile and take donations away immediately rather than letting them pile up in the corner. A clean workspace is easier to maintain than to create, so protect it with small habits.
A cluttered workshop slows every job and hides the tools you need. StorageCentral stocks practical, affordable options to fix that, from wall-mounted bin racks and peg boards to heavy-duty steel shelving built to carry the load. View our workshop and garage storage range and get your bench back.